Ideogram 4.5

Ideogram 4.5 is Ideogram's image generation and editing model, built for iterative work that keeps untouched regions intact across repeated edits. It generates images from text at 1K and 2K presets, and edits a source image using up to four more images as references, with an optional mask to limit where changes land. It suits product imagery, campaign variations, interior restyling, and pose changes guided by a skeleton reference.
Editing with reference images
How to edit an image with Ideogram 4.5 and up to four reference images: numbering the inputs, taking one attribute from each, choosing the output size and adding a mask.
Introduction
Ideogram 4.5 edits images with the same model it uses to generate them. Pass images in inputs.referenceImages and the first one becomes the image being edited. Any others, up to four more, are references the instruction can pull from, such as a product to place or a fabric to upholster with.

Place the sage green stand mixer from image 2 on the empty countertop in the center of image 1, at a realistic scale for the counter, with a soft contact shadow on the quartz. Keep the kitchen, the light and the camera of image 1 unchanged.
- Image 1
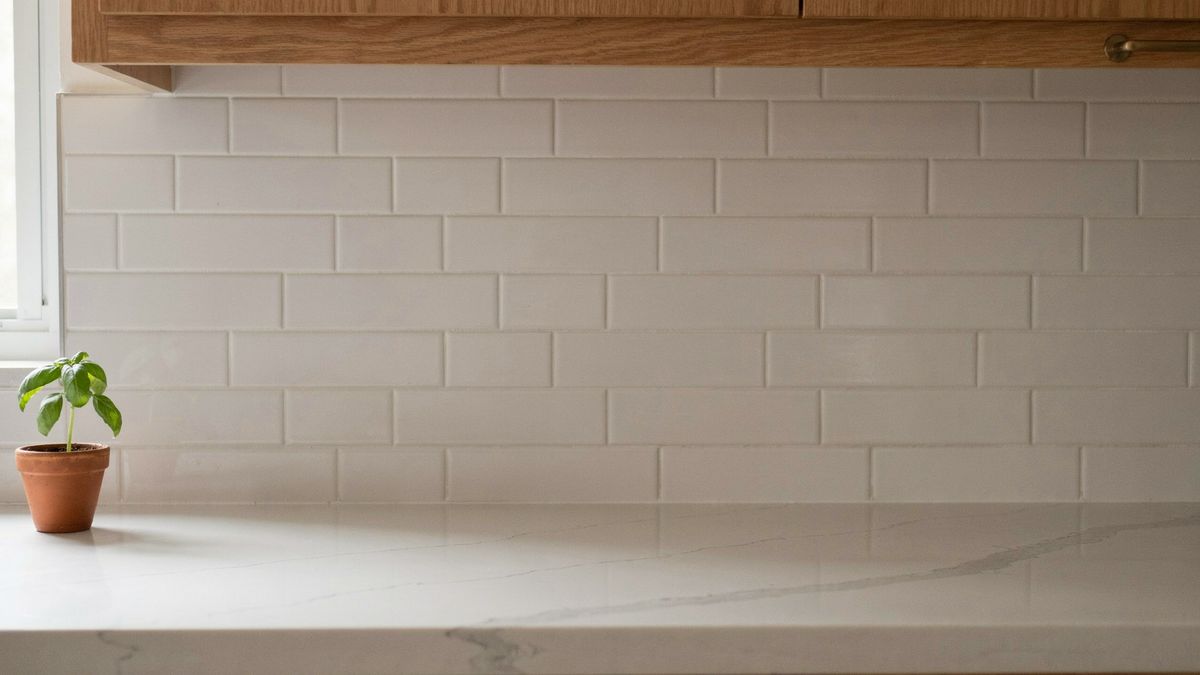
Photorealistic close-up interior photograph of a short stretch of white quartz kitchen countertop, shot straight-on at counter height with an 85mm lens: the counter surface fills the lower half of the frame, a white tiled backsplash and the bottom edge of a light oak cabinet fill the upper half, a small potted basil plant sits at the far left edge, and the center of the counter is completely empty. Soft morning light from a window on the left.
- Image 2
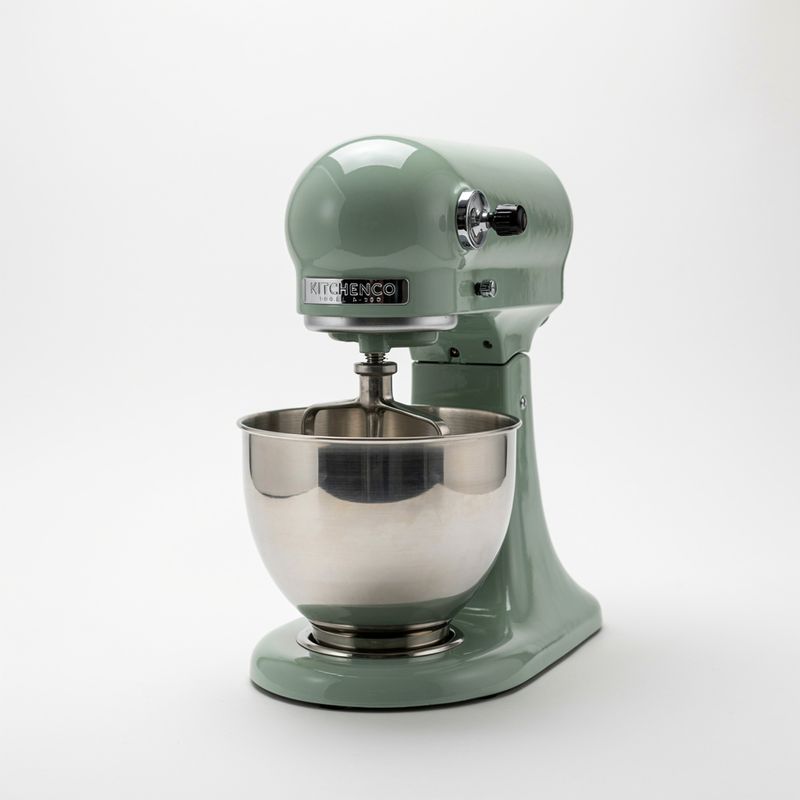
E-commerce packshot of a retro-style stand mixer in glossy sage green with a polished stainless steel bowl and a chrome beater, three-quarter view, on a plain white background, soft studio light, a faint shadow below.


That is a product shot placed into a lifestyle scene in one call. The mixer takes the kitchen's morning light from the left and casts a shadow on the quartz, instead of looking pasted onto it.
This guide covers how the images are numbered, combining several references, taking a different attribute from each one, choosing the output size, limiting the edit with a mask and choosing a quality tier.
How the images are numbered
The order of inputs.referenceImages is the numbering the prompt uses. The first entry is image 1, the one being edited, and the rest are image 2 to image 5.
import { createClient } from '@runware/sdk'

const client = await createClient({ apiKey: process.env.RUNWARE_API_KEY })
await client.connect()

const [result] = await client.run({
  model: 'ideogram:4.5@0',
  positivePrompt: 'Place the sage green stand mixer from image 2 on the empty countertop in the center of image 1, at a realistic scale for the counter, with a soft contact shadow on the quartz. Keep the kitchen, the light and the camera of image 1 unchanged.',
  inputs: {
    referenceImages: [
      'https://example.com/kitchen.jpg',
      'https://example.com/stand-mixer.jpg'
    ]
  },
  width: 2560,
  height: 1440
})
import asyncio
import os
from runware import Runware
async def main():
async with Runware(api_key=os.environ["RUNWARE_API_KEY"]) as client:
results = await client.run({
"model": "ideogram:4.5@0",
"positivePrompt": "Place the sage green stand mixer from image 2 on the empty countertop in the center of image 1, at a realistic scale for the counter, with a soft contact shadow on the quartz. Keep the kitchen, the light and the camera of image 1 unchanged.",
"inputs": {
"referenceImages": [
"https://example.com/kitchen.jpg",
"https://example.com/stand-mixer.jpg"
]
},
"width": 2560,
"height": 1440
})
asyncio.run(main())curl https://api.runware.ai/v1 \
-H "Authorization: Bearer $RUNWARE_API_KEY" \
-H "Content-Type: application/json" \
-d '[
{
  "taskType": "imageInference",
  "taskUUID": "4d9b2e7f-1a63-4c80-b5e2-9f7a3c1d6e08",
  "model": "ideogram:4.5@0",
  "positivePrompt": "Place the sage green stand mixer from image 2 on the empty countertop in the center of image 1, at a realistic scale for the counter, with a soft contact shadow on the quartz. Keep the kitchen, the light and the camera of image 1 unchanged.",
  "inputs": {
    "referenceImages": [
      "https://example.com/kitchen.jpg",
      "https://example.com/stand-mixer.jpg"
    ]
  },
  "width": 2560,
  "height": 1440
}
]'runware run ideogram:4.5@0 \
positivePrompt="Place the sage green stand mixer from image 2 on the empty countertop in the center of image 1, at a realistic scale for the counter, with a soft contact shadow on the quartz. Keep the kitchen, the light and the camera of image 1 unchanged." \
inputs.referenceImages.0=https://example.com/kitchen.jpg \
inputs.referenceImages.1=https://example.com/stand-mixer.jpg \
width=2560 \
height=1440{
"taskType": "imageInference",
"taskUUID": "4d9b2e7f-1a63-4c80-b5e2-9f7a3c1d6e08",
"model": "ideogram:4.5@0",
"positivePrompt": "Place the sage green stand mixer from image 2 on the empty countertop in the center of image 1, at a realistic scale for the counter, with a soft contact shadow on the quartz. Keep the kitchen, the light and the camera of image 1 unchanged.",
"inputs": {
"referenceImages": [
"https://example.com/kitchen.jpg",
"https://example.com/stand-mixer.jpg"
]
},
"width": 2560,
"height": 1440
}Response
[
  {
    "taskType": "imageInference",
    "taskUUID": "4d9b2e7f-1a63-4c80-b5e2-9f7a3c1d6e08",
    "imageUUID": "a6e1c3f8-2b94-4d57-8e0a-7c5f1b9d2e46",
    "imageURL": "https://im.runware.ai/image/os/a14d18/ws/2/ii/a6e1c3f8-2b94-4d57-8e0a-7c5f1b9d2e46.jpg"
  }
]
Write the instruction in terms of those numbers: take something from image 2, put it somewhere in image 1, keep the rest of image 1. Naming each input by its number leaves no doubt about which picture holds the kitchen and which holds the mixer.
settings.magicPrompt does not apply here. A request with inputs.referenceImages rejects the setting, because edits prepare their own instructions from what you write.
Several references in one edit
One call can bring up to four references into the edit. The try-on below swaps three pieces of an outfit at once.

Dress the man in image 1 in the rust corduroy overshirt from image 2, worn open over his gray t-shirt, the black leather sneakers from image 3 in place of his white sneakers, and the navy cap from image 4. Keep his face, his pose, his jeans, the street and the framing of image 1 unchanged.
- Image 1
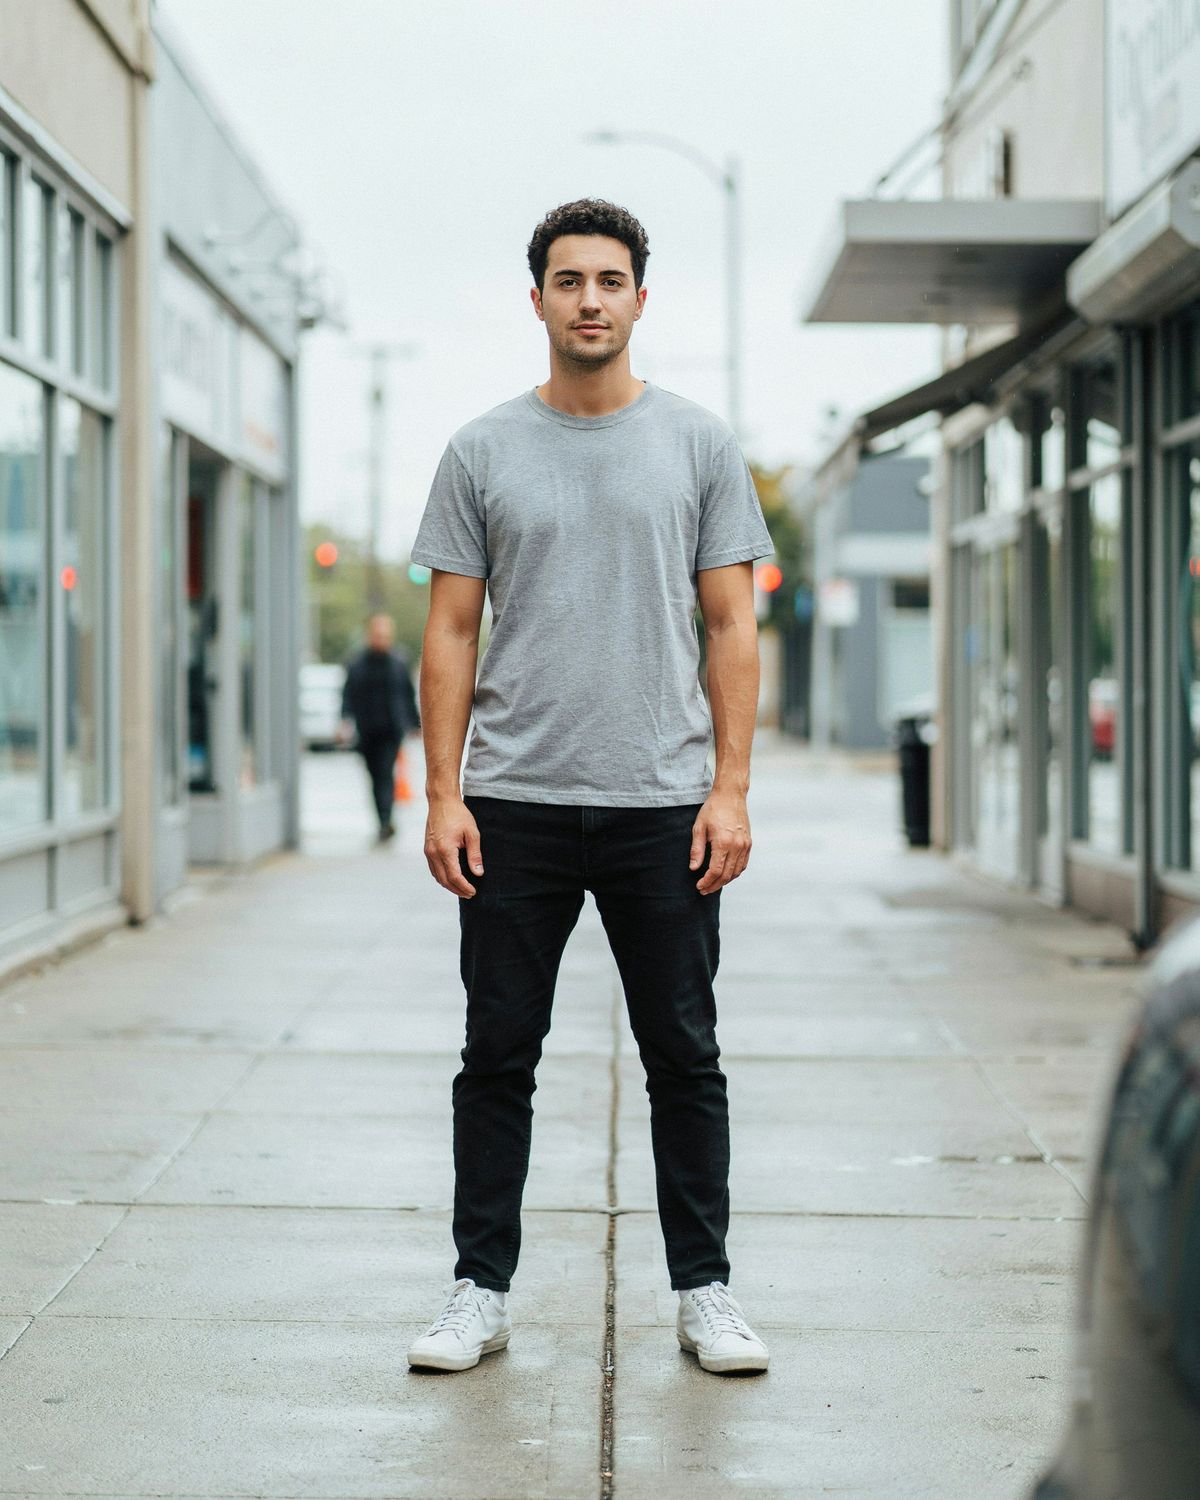
Photorealistic street style photograph of a man in his late twenties with short curly hair standing on a quiet city sidewalk, facing the camera, full figure from head to toe, wearing a plain gray t-shirt, black jeans and plain white sneakers, hands relaxed at his sides. Soft overcast daylight, blurred shopfronts behind him, shot on a 50mm lens at waist height.
- Image 2
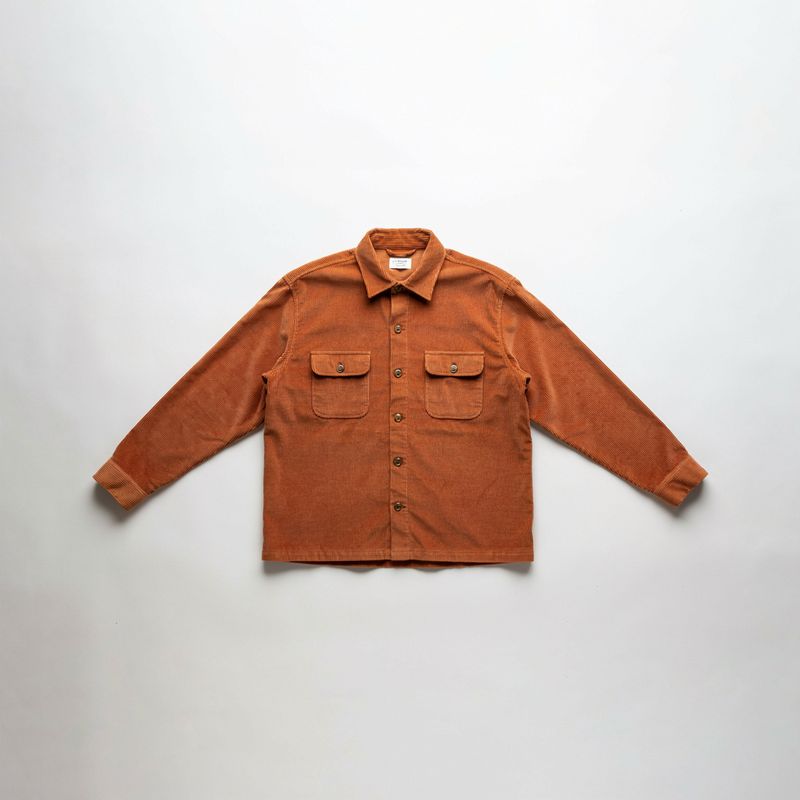
Flat lay product photograph of a rust orange corduroy overshirt with two chest pockets and brown buttons, laid out neatly on a plain white background, shot from directly above, soft even light.
- Image 3
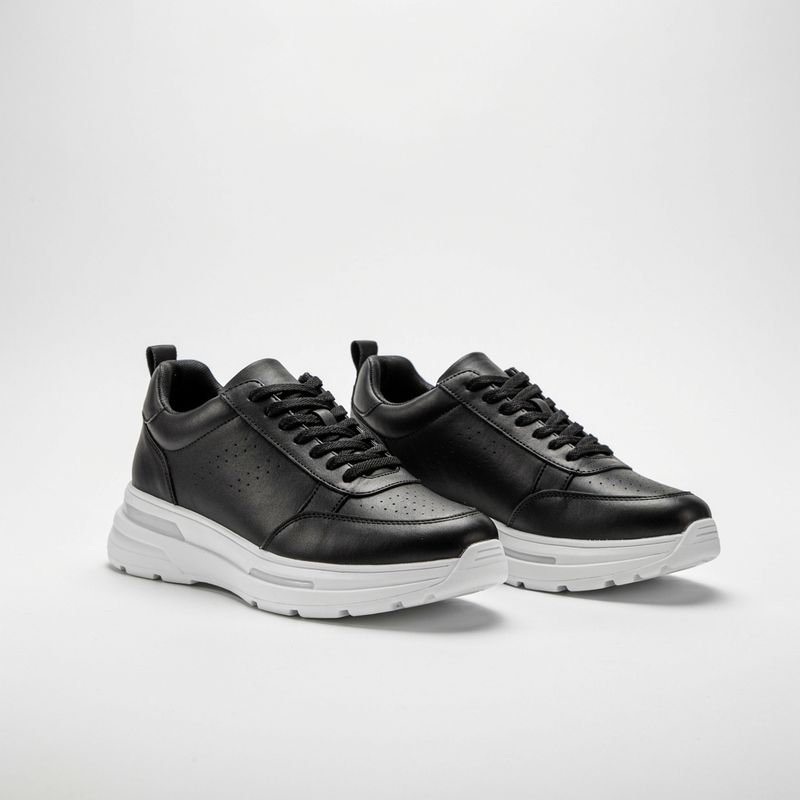
Product photograph of a pair of chunky black leather sneakers with thick white soles and black laces, side by side at a three-quarter angle on a plain white background, soft even light.
- Image 4
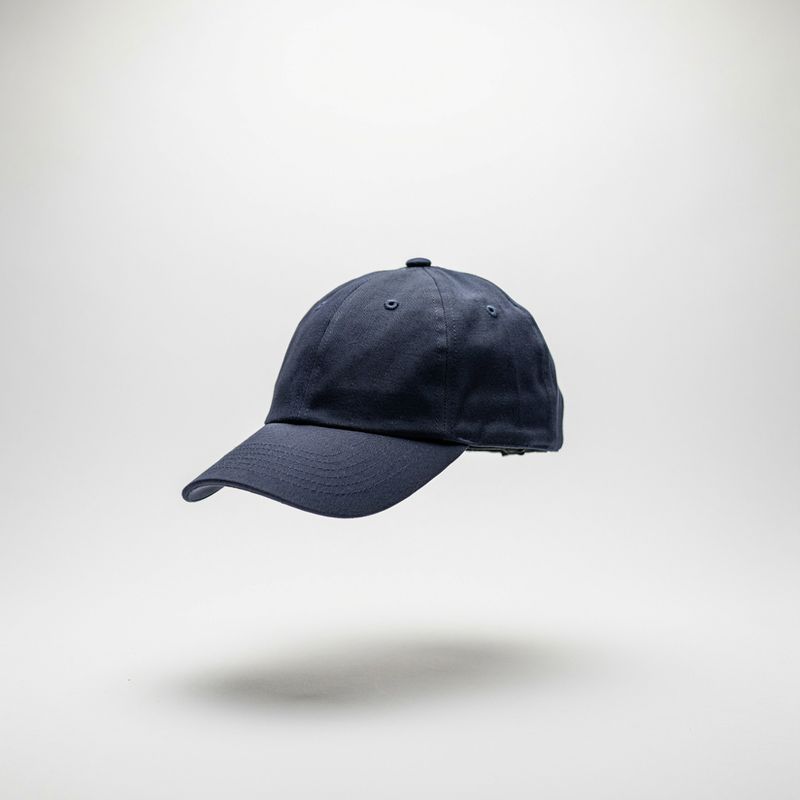
Product photograph of a plain navy wool baseball cap with a curved brim, three-quarter view on a plain white background, soft even light.


Each piece gets its own clause and its own number, and each clause says how it is worn: open over the t-shirt, in place of the white sneakers. The keep clause lists what the swap must not touch, and the jeans are on that list because they are the one garment staying.
One attribute from each reference
A reference can contribute a single property instead of a whole object. Say which property you want from which image, and different references can supply the shape and the material of the same thing.

Add the armchair from image 2 in the empty space beside the window in image 1, with its seat and back upholstered in the terracotta boucle fabric from image 3. Keep the room, the light and the camera of image 1 unchanged.
- Image 1
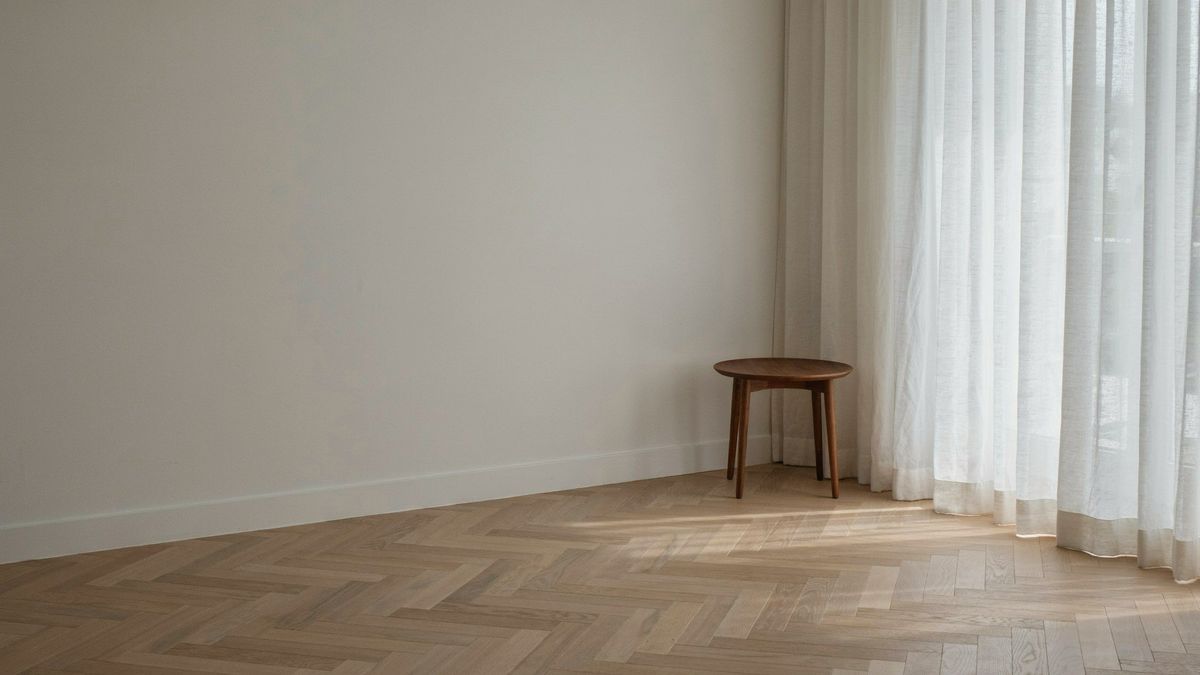
Photorealistic interior photograph of a calm living room corner: a large window with sheer white curtains on the right, a pale oak floor, a plain white wall, a small round walnut side table, and an empty space on the floor beside the window. Soft daylight, shot straight-on at seated eye level with a 35mm lens.
- Image 2
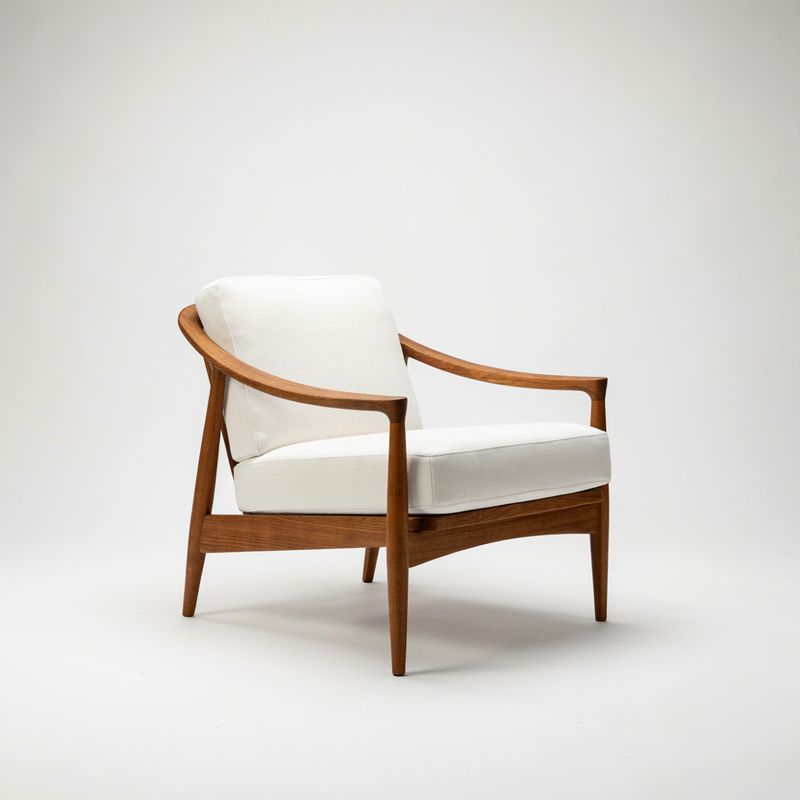
Product photograph of a mid-century lounge armchair with a curved solid walnut frame, wide armrests and a plain white cushioned seat and back, three-quarter view on a plain white background, soft studio light.
- Image 3
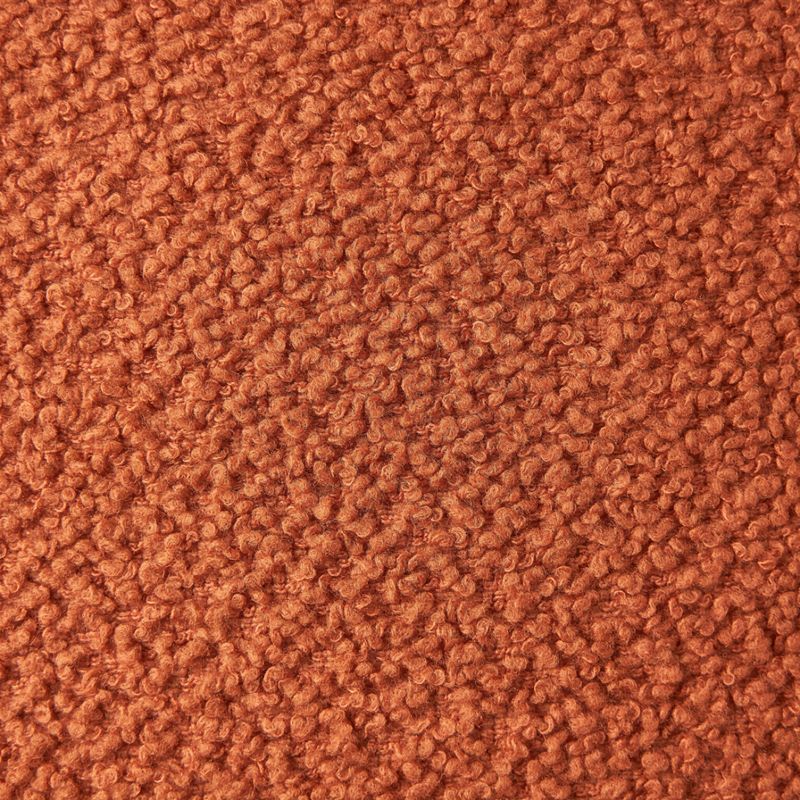
Close-up flat swatch of terracotta boucle upholstery fabric with a dense looped, nubby texture, filling the entire frame, soft even light, no other objects.


The chair keeps the walnut frame from image 2 and takes its upholstery from image 3, which never showed a chair at all. That is how one furniture photo becomes every fabric in a catalog: a product reference for the shape and a swatch for each option.
Choosing the output size
With references, width and height are not limited to the text-to-image presets. Any size works as long as both sides are multiples of 32 and at least 256, the area stays within 4,194,304 pixels (2048 × 2048) and the ratio is no wider than 6:1. Leave both out and the model picks a 2K canvas on its own.

Reframe image 1 as a wide web banner: extend the sandstone block and the warm beige background to the left and right. Keep the sunglasses, their shadow and the light of image 1 unchanged.
- Image 1, 2048 × 2048
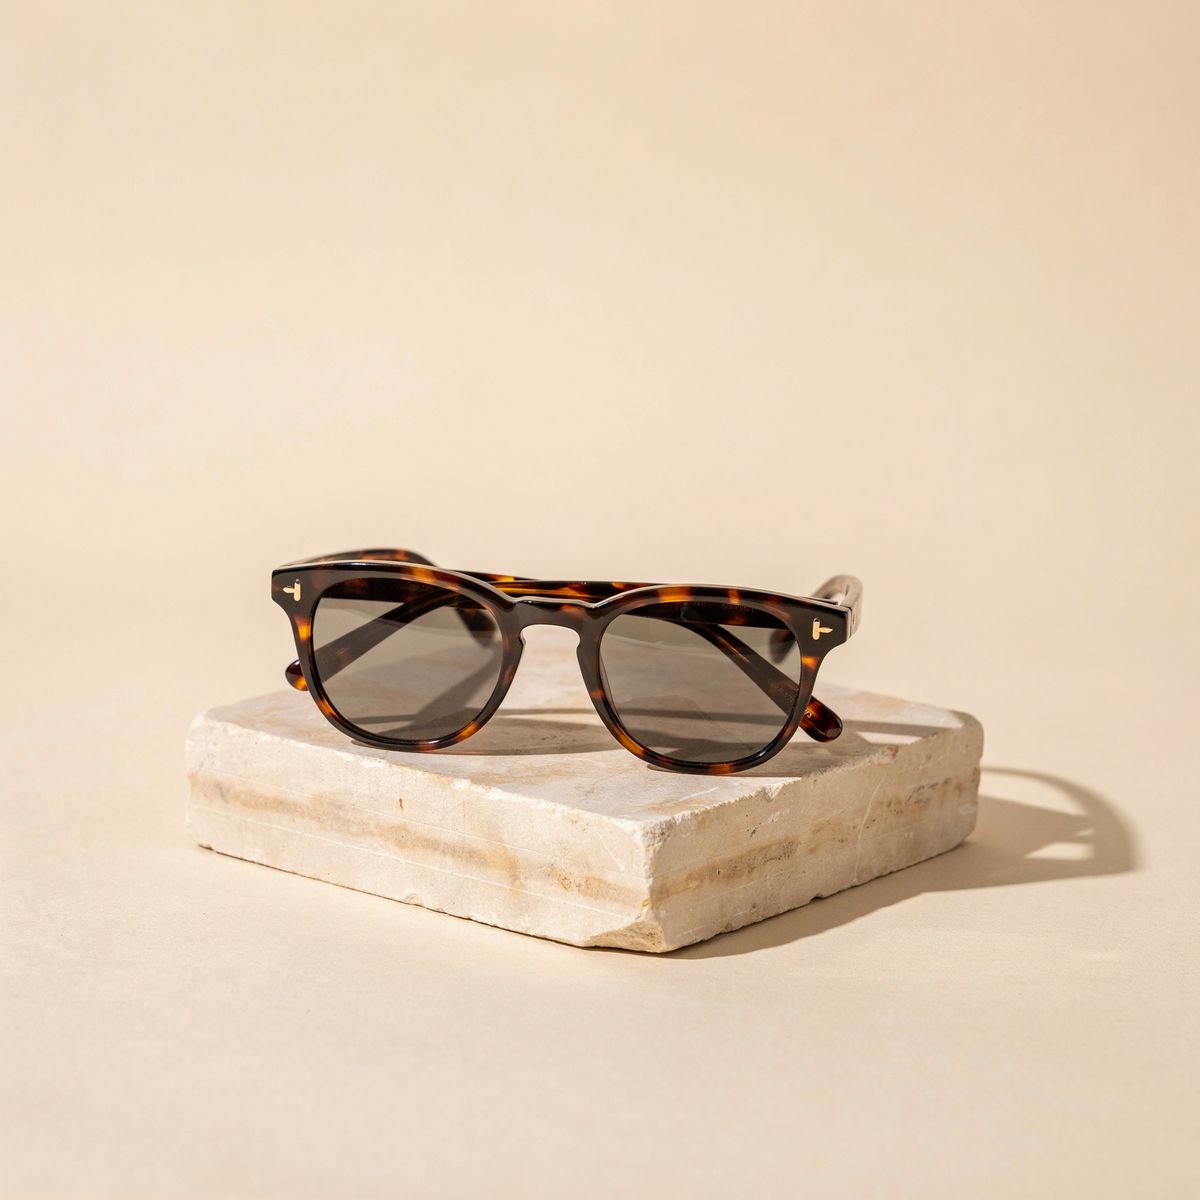
Square e-commerce product photograph of a pair of tortoiseshell sunglasses resting on a pale sandstone block against a soft warm beige background, hard afternoon sunlight casting a crisp shadow to the right, the sunglasses centered.

The banner came from the square packshot in one call. The prompt says how to fill the new space, and width and height decide the shape, so the same source can be run once per placement a campaign needs.
To keep the source's framing on an ordinary edit, pass its own dimensions, as every other example in this guide does. The output then lines up with image 1 pixel for pixel in size, which is what a before and after comparison needs.
Limiting the edit with a mask
inputs.maskImage restricts the edit to the white region of a black and white image laid over image 1. The mask must match image 1's dimensions exactly and contain both white and black.

Photorealistic interior photograph of a modern bathroom vanity: a white floating vanity with a round white vessel sink and a brushed brass faucet, a large plain rectangular frameless mirror centered above it on a sage green tiled wall, and a small plant in a white pot on the counter. Shot straight-on at standing height with a 35mm lens, soft even light.

Replace the rectangular mirror in image 1 with the round brass-framed mirror from image 2, centered above the sink. Keep everything else in image 1 exactly the same.
- Image 2
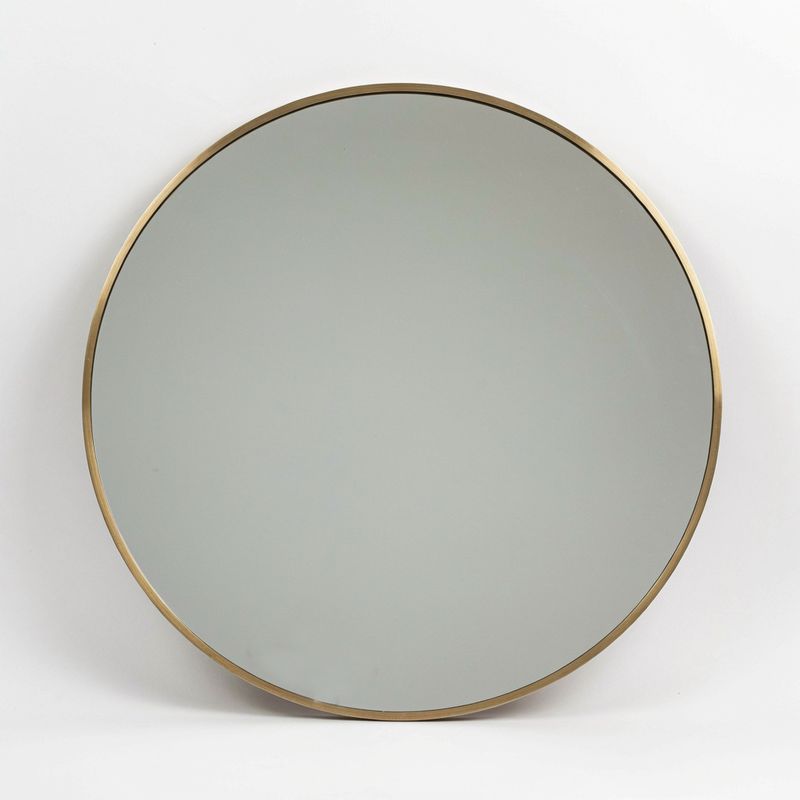
Product photograph of a round wall mirror with a thin brushed brass frame, front view, on a plain white background, soft even light, the mirror reflecting a plain light gray wall.

A masked request takes no size of its own, so leave out width and height. The result keeps image 1's proportions, scaled to at most 2048 pixels on the longer side, and the request accepts four images in total: image 1 plus up to three references. The vanity and the tiles below the mask are outside the white region, and they came back unchanged.
For mask technique in depth, from picking one object out of several to placing something new, see Masked edits for Ideogram 4.5 Precise Edit.
Choosing a quality tier
With references, settings.quality takes very_low, low, medium or high, and high is the default. very_low exists only for edits, as the fastest and cheapest way to check that an instruction lands. At high, the model picks the best of several candidates.

Photorealistic automotive dealership photograph of a white compact SUV parked at a three-quarter front angle on a clean light concrete forecourt in front of a glass showroom, overcast daylight, soft reflections on the paint, shot on a 35mm lens at headlight height.

Change the paint of the SUV in image 1 to a metallic deep blue. Keep the wheels, the windows, the forecourt and the showroom unchanged.

Change the paint of the SUV in image 1 to a metallic deep blue. Keep the wheels, the windows, the forecourt and the showroom unchanged.

Change the paint of the SUV in image 1 to a metallic deep blue. Keep the wheels, the windows, the forecourt and the showroom unchanged.

Change the paint of the SUV in image 1 to a metallic deep blue. Keep the wheels, the windows, the forecourt and the showroom unchanged.
Every tier got the color right, which is the question very_low is there to answer. The difference is how much of image 1 survives: very_low redrew the front of the car and lost the chrome trim around the grille, while low and up keep the trim and the rest of the body as shot. Settle the instruction at very_low, then render the one you keep at high.
Ideogram 4.5 or Precise Edit
Ideogram 4.5 renders the whole frame on every edit, which is what lets it reshape a square packshot into a banner. When an edit has to leave everything else pixel-identical, across one round or ten, use Ideogram 4.5 Precise Edit, which restores every unchanged pixel from the source.
Tips
-
Put the image to edit first. The first entry in
inputs.referenceImagesis the one that changes. -
Refer to every input by its number. "The mixer from image 2" cannot be mistaken for anything in image 1.
-
Say what to take from each reference. Shape from one image and material from another is a single instruction.
-
Pass the source's size to keep its framing. Leave
widthandheightout and the model picks the canvas. -
Count images when you mask. A masked edit takes image 1 plus three references at most.
-
Draft at
very_low. It is the cheapest way to check that an instruction lands before paying forhigh.